We got a huge art kit about dinosaurs. It is made by Djeco and called World of Dinosaurs. When I say this art kit is huge I mean it is massive. There are 6 different projects to do. Each one is cooler than the last. There are 4 scratch art ones, one painting project, two 3D picture boards, 1 stamp and drawing scene, 1 foam and foil collage and 3 assembly projects to complete. The kit comes with everything that you will need. The manual included has all the instructions down in pictures so it is really easy for kids to know what to do on their own without help. I always hang out while she does art and we chat while she does her projects. Since our oldest daughter is a huge lover of art and all things creative we actually sat down and did one of each art project in one go after school. The scratching art kits each have a different dinosaur. There are rougeosaure, vertosaure, aquasaure and plumosaure which is the one that our daughter chose to do. The manual shows that you just scratch the card so very simple. Our daughter does get overwhelmed with these because you have to scratch all of the card so I either take turns with her doing a section at a time or she can scratch the card throughout the week. At first I thought this one you scratch the design yourself so that is why our picture of it does not show the full design.
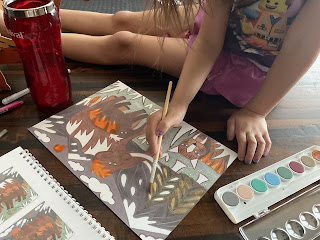
The painting one was next. There is only one of these and it has woolly mammoths and a sabre tooth tiger. This one you paint the white spaces the colors that the manual shows. What was nice about this one was our daughter wanted to know more about the animals specifically the sabre tooth tiger so we got to have a great discussion about them. Then the 3D picture boards were started. There are two of these each with a different main dinosaur; a tachosaure and a triceratops. She chose the triceratops. This one comes with lots of precut pictures that you just have to punch out. Then you put the double-sided sticky foam squares on the backs of the pictures and place them to the board like in the manual. You have to place them in a certain order to achieve the 3D effect. This one we both had a lot of fun with. I think it has such a cool look when it is finished because of the pictures being different depths from the board.
The next one we tried out was the stamp and drawing project. This one I was so surprised by how big it was. All of our other Djeco kits have been a moderate size but this one is huge! It unfolds to a scene of a family of dinosaurs. I do not know what kind of dinosaur because the manual did not say on this one. You get 13 stamps, a pad of blue ink and a silver pen to decorate the project with. The manual does show where to put what stamps and what to draw with the pen but on this one I let our daughter do it however she wanted. With art I feel it is important to let kids be creative. I even got to do this one with her since it was so big. She really loved this one because of the stamps. The pen she really did not do much with.
Up next we tried the foam and foil collage. This one was another big hit with our daughter. This one also did not say what kind of dinosaur it was but that is ok. There are foam pieces to punch out. Each one is sticky on both sides. You will peel off the bottom paper then stick it on the same number that is on the board. We placed all the foam stickers first then peeled off the top paper of the ones with the same number. After that we got the matching foil paper and pressed them into the foam. Our daughter absolutely loved this part. She was shouting out "and now the reveal" each time she took off the foil. The last project in this massive kit is an assembly one. There are 3 of these each being a different dinosaur; t-rex, triceratops and a brachiosaure. These are way bigger than I thought they would be. I thought they would be about 2-3 inches but they are huge. She chose the brachiosaure and we began to punch out the precut cardboard pieces. The piece easily go into each other which is nice because other projects like these are quite difficult and then the pieces get bent as a result. After we finished building it our daughter decided it is her pet named Dina and its' nickname is Brachy.
As you can tell this Djeco kit was a ton of fun. We have some more art kits that we will be trying out so be sure to come back and see what they are as well as what we thought about them. Our daughter said this one was the most fun kit we have gotten yet and has since been playing with her brachiosaure, Dina. Do you have any art kits or projects that you really like? Let us know in the comment section below.


This looks like something my grandkids would enjoy. I'll have to check it out!
ReplyDelete